Last year we rigged up a new set of snubbers for when we anchor out. I did a prior post on snubbing and how it works. What I did not do at the time, much to my shame, was to add chafe guards to the line to help prevent the constant rubbing these lines get especially during a good blow.
We use a Seadog chain grabber (they used to be made by ABI) and it slides on to the chain link. The lines are attached via thimbles and shackles, which are wire tied to prevent them from becoming loose. Our experience has been these are better than other types we have used such as the hook.
We know where the chafe occurs from the marks formed from previous anchoring and we will add about 28-30" of fire hose that our good friend Captain Ray Cope got at Sailorman in Ft. Lauderdale. This is a really cool store with the usual and a whole lot of the unusual, in this case Ray was able to pick up about 25' of fire hose which makes excellent chafe guard.
Aside from the heavy cotton outside which is very durable, the inside has a synthetic waterproof rubber type coating. We split the hose down the middle and our 3/4' in line will fit nicely when we fold the edges over and sew then together.
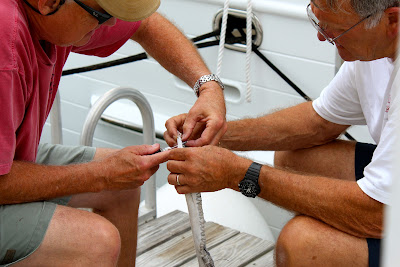
To hand sew this we are using a tool called awl for all, a lock stitching awl. We never have used this before so I used my morning coffee time to look at the directions. Ray and I practiced on a scrap piece from an old chafe guard. The tool has a bobbin with wax coated thread which slides through a channel in a heavy duty needle.
The first and very important initial step is to push a needle through and pull enough thread to the other side; about equal half again as much as the length of the chafe guard, this is used on the back side link into the lock stitch.
Pushing through all four ends of the folded down fire hose takes some twisting action and once through you pull back slightly to create a loop to slide the coated wax thread that we pulled on the other side when first starting.
Here is the thread being pulled through the loop.
The last step is to pull the two lines and tighten the lock step. I found initially I was placing the stitching to close together and later spread it out to about a half inch between each stitch.
When I finished one I went back and secured the line into the chafe guard at both ends so it would not slip.
The finished product: The first one was done with the black waxed thread and was a bit messier. I thought I would whip the ends but later decided it was a waste of thread and closed both ends with stitches through the middle of the line.
The top one pictured was the second attempt and is a bit neater as my skill level improved.
The theme for the day was knit one, purl two and tell tall tales.
The telling of tale tales was the best part of course.
Who said boating was just fruity drinks with umbrellas in them...???


No comments:
Post a Comment
Note: Only a member of this blog may post a comment.